Connecting Kouncil to Amazon MSK

There are many ways to run Kafka, ranging from the simplest, such as running it locally, to more complex based on cloud solutions. In this article, we will take a look at one of the cloud solutions - Amazon Managed Streaming for Apache Kafka, or Amazon MSK for short. We will go step by step from creating a Kafka cluster to connecting it to Kouncil. We will also deploy Kouncil in the cloud. In this article, we’ll demonstrate the most fundamental approach, beginning with an empty Centos. However, if you are already using AKS or Beanstalk, you can run Kouncil as a part of your architecture, as it comes down to running a Docker container.
Cluster creation
Creating a Kafka cluster on Amazon MSK is very simple. We need to go to the Amazon MSK page and select Create cluster to see a cluster configurator. For this article, I will choose Quick create and Provisioned cluster type. With this configuration, we need to wait several minutes for the cluster to be available.
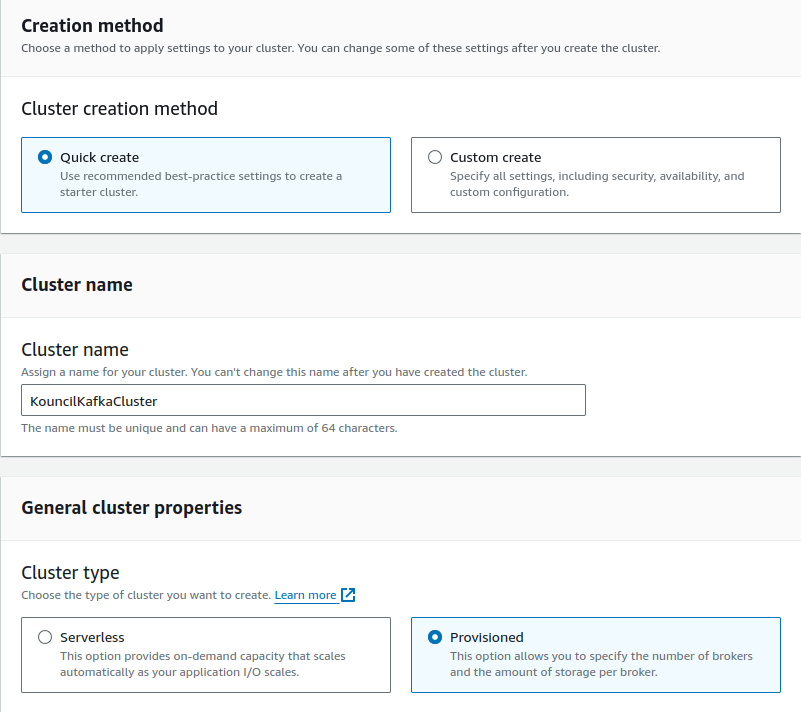 Kafka cluster configuration
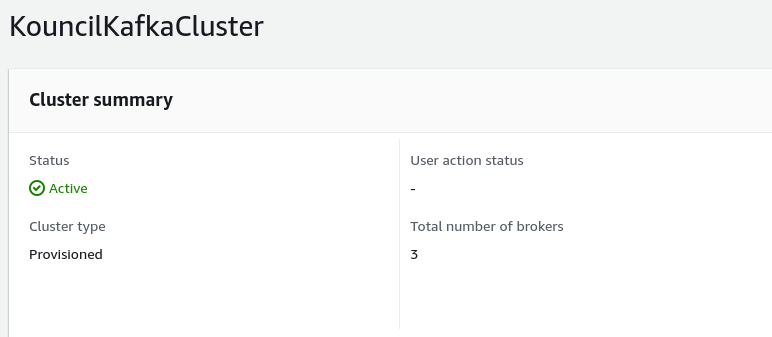 Created Kafka cluster
Creating an IAM role
To create an IAM policy, we need to go to the IAM page and select Policies from the side menu, then Create policy.
 Adding an authorization rule
As for the editor, I suggest switching to the JSON version. It will make the configuration of policy easier. The following policy enables you to perform all operations on your Kafka cluster. Just remember to change the region, Account-ID, and ClusterName.
{
    "Version": "2012-10-17",
    "Statement": [
        {
            "Effect": "Allow",
            "Action": [
                "kafka-cluster:*"
            ],
            "Resource": [
                "arn:aws:kafka:region:Account-ID:cluster/ClusterName/*"
            ]
        },
        {
            "Effect": "Allow",
            "Action": [
                "kafka-cluster:*"
            ],
            "Resource": [
                "arn:aws:kafka:region:Account-ID:topic/ClusterName/*"
            ]
        },
        {
            "Effect": "Allow",
            "Action": [
                "kafka-cluster:*"
            ],
            "Resource": [
                "arn:aws:kafka:region:Account-ID:group/ClusterName/*"
            ]
        }
    ]
}
Next, we need to attach the policy created above to the IAM role. To do this, select Roles from the side menu and then Create roles. Select EC2 as the Use case, and on the next screen select the policy rule we created earlier. Click Next, name the role, and create the role using Create roles.
After performing the above configuration, we have two options. The first is to run Kouncil on the AWS infrastructure, connect Kafka Amazon MSK, and set public access to Kouncil. The second option, in our opinion less secure, is to set public access to Kafka.
Option 1 - running Kouncil in AWS infrastructure
To run Kouncil in an AWS infrastructure, we will need an Amazon EC2 instance. Create it here by clicking on Launch instance, and then name it. You can leave the default value for Amazon Machine Image (AMI). Choose t2.micro as the instance type. Then, if you don’t have one, create a new login key pair and download it. After expanding Advanced Details, select in the IAM instances profile the IAM role created earlier. Then, click Launch instance.
Security group configuration
To make Kouncil accessible from the outside, we need to configure the security group, specifically, allow access to the port on which Kouncil will be run. To do this, select the instance from the list and go to the Security tab.
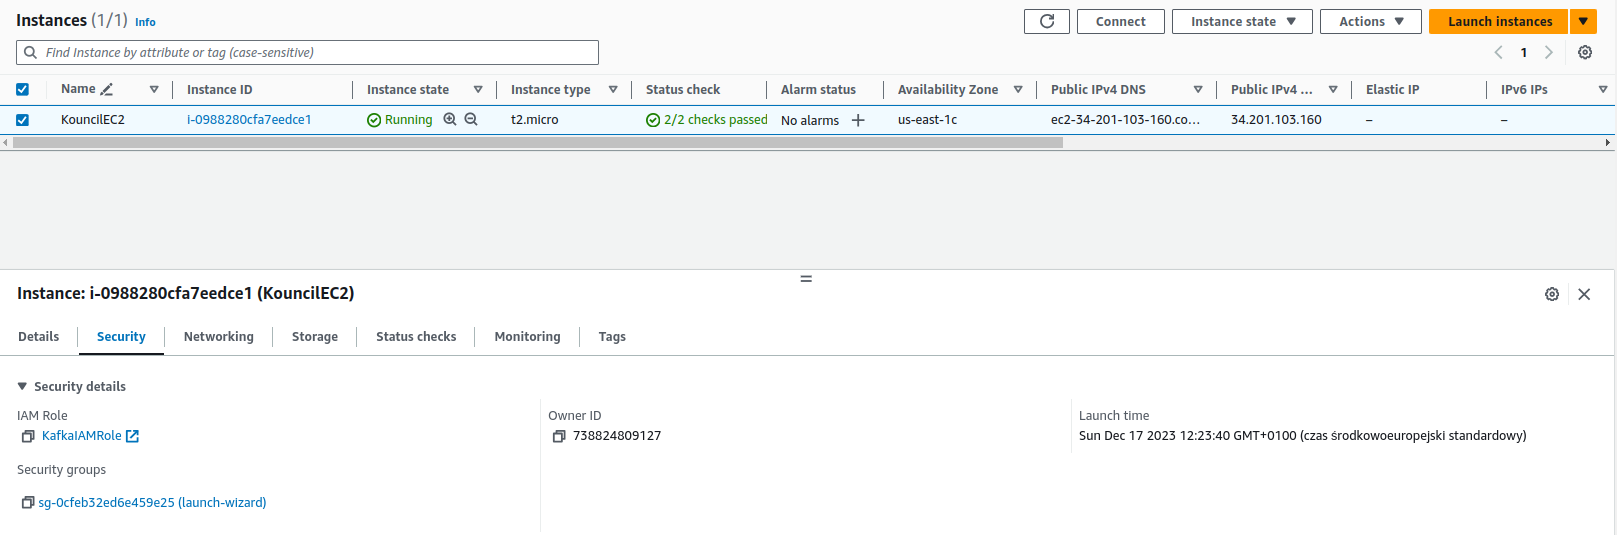 Security details of our instance
Next, go to the security group attached to our instance. In the details of the group, click Edit inbound rules to add a new rule. Click Add rule and select the HTTP type for which the default port 80 will be set. Select Anywhere-IPv4 as the Source. With this configuration, Kouncil will be accessible from any IP address. You can restrict access by specifying an IP address or a range of IP addresses.
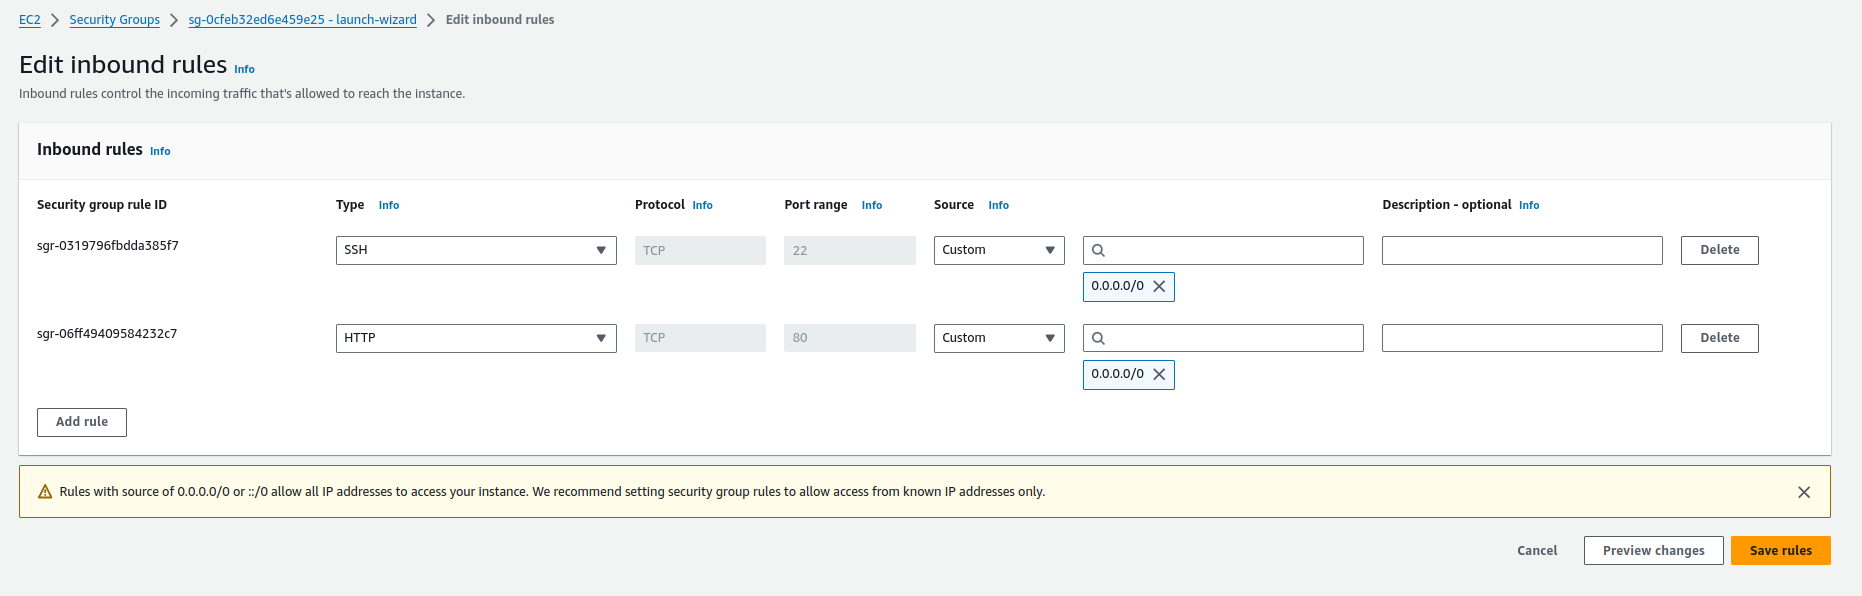 Adding the rule enabling connection to Kouncil
We still need to modify the security group used by our Kafka cluster. To do this, go to the cluster details and then to the attached security group. Click Edit inbound rules.
Next, click Add rule. Select Custom TCP. As a port, set the port on which brokers are available, the default is 9098. In Source, choose Custom and indicate the security group used by the instance where the Kouncil will be run. Finally, click Save rules.
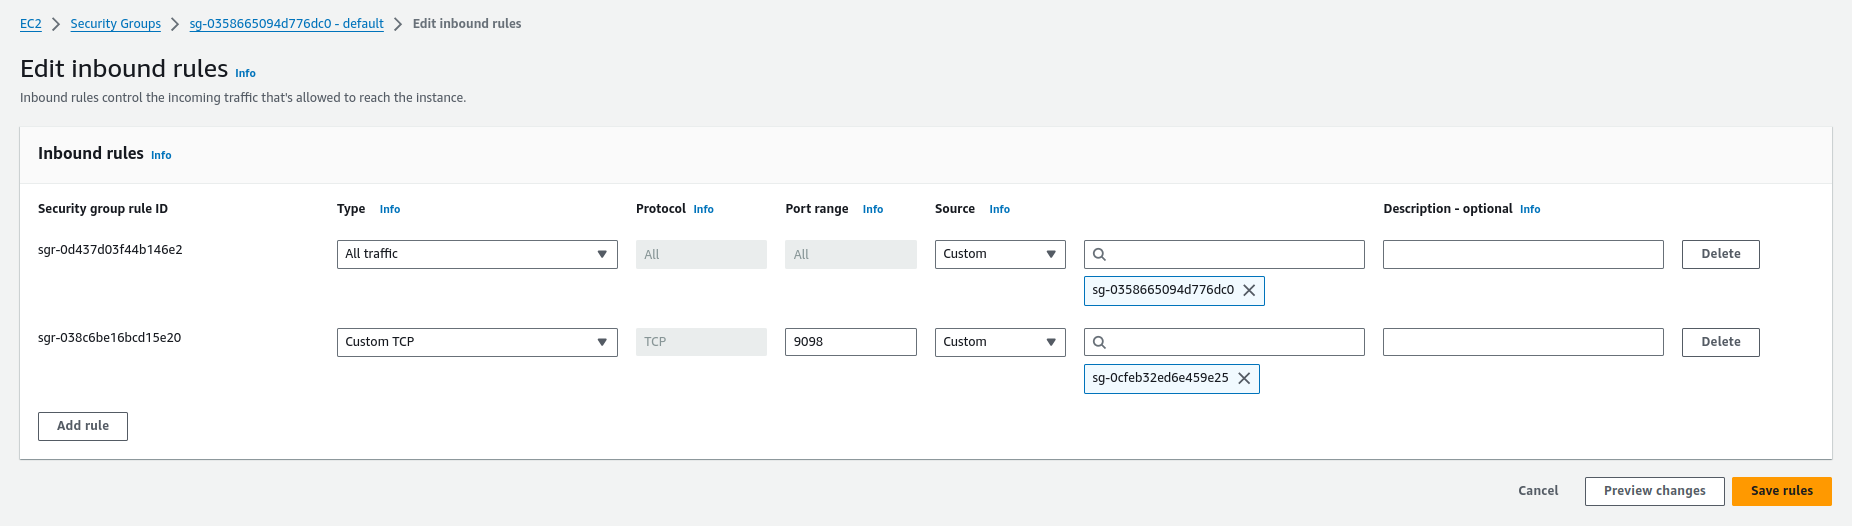 Adding a rule that allows communication with Kafka brokers
Running the instance
To run the instance, return to the list of instances, select it from the list and click Connect. On the next screen, keep the default values and select Connect.
Creating the Kouncil configuration
We need to create a file containing the Kouncil configuration, where we will provide a connection string to the Kafka cluster brokers we created at the beginning. You’ll find the connection string for the private endpoint of our Kafka brokers in the details of the cluster by clicking on the View client information button.
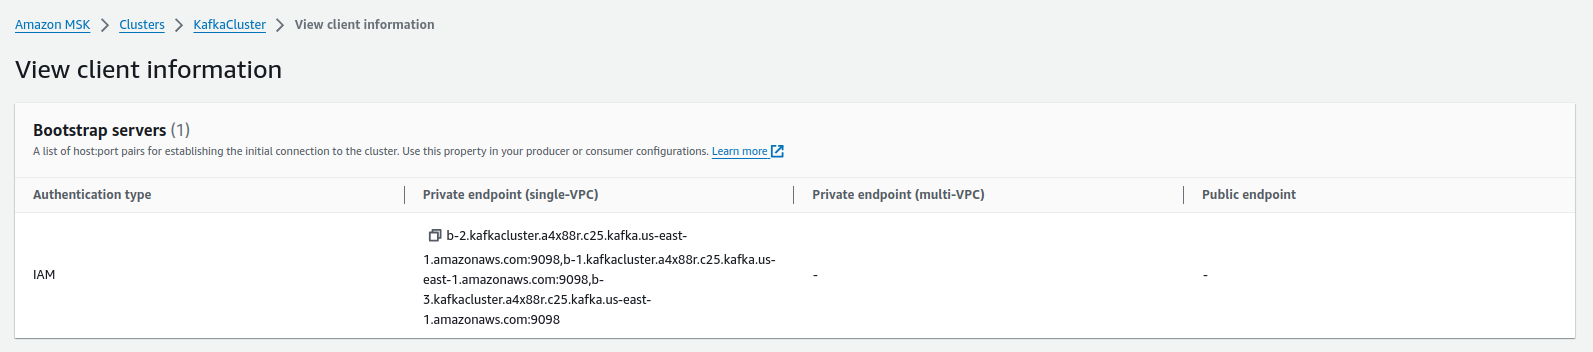 Private addresses of Kafka brokers (available within the AWS infrastructure)
The contents of the Kouncil configuration file should look as follows:
kouncil:
  clusters:
    - name: aws-msk-cluster
      brokers:
        - host: b-1.kafkacluster.a4x88r.c25.kafka.us-east-1.amazonaws.com
          port: 9098
          saslMechanism: "AWS_MSK_IAM"
          saslProtocol: "SASL_SSL"
          saslJassConfig: software.amazon.msk.auth.iam.IAMLoginModule required;
          saslCallbackHandler: "software.amazon.msk.auth.iam.IAMClientCallbackHandler"
Launching Kouncil
Once you have created the configuration file, you need to install Docker, and you will be able to launch the application.
First, let’s refresh the installed packages and package cache on our instance with the command:
sudo yum update -y
To install Docker, run the following command:
sudo yum install docker
Once Docker is installed, start the Docker service with the command:
sudo service docker start
Finally, let’s add a user (in my case ec2-user) to the Docker group, so that we can execute Docker commands without using a sudo.
sudo usermod -a -G docker ec2-user.
Next, log out of the instance and log into it again. You can check whether the Docker installation is correct with the docker info command, which will list the configuration of the running Docker.
To start Kouncil, run the following command:
docker run -m 1G -d -p 80:8080 --restart always -v /home/ec2-user/:/config/ --name kouncil consdata/kouncil:latest_snapshot
Now let’s check the public DNS of the instance (Public IPv4 DNS).
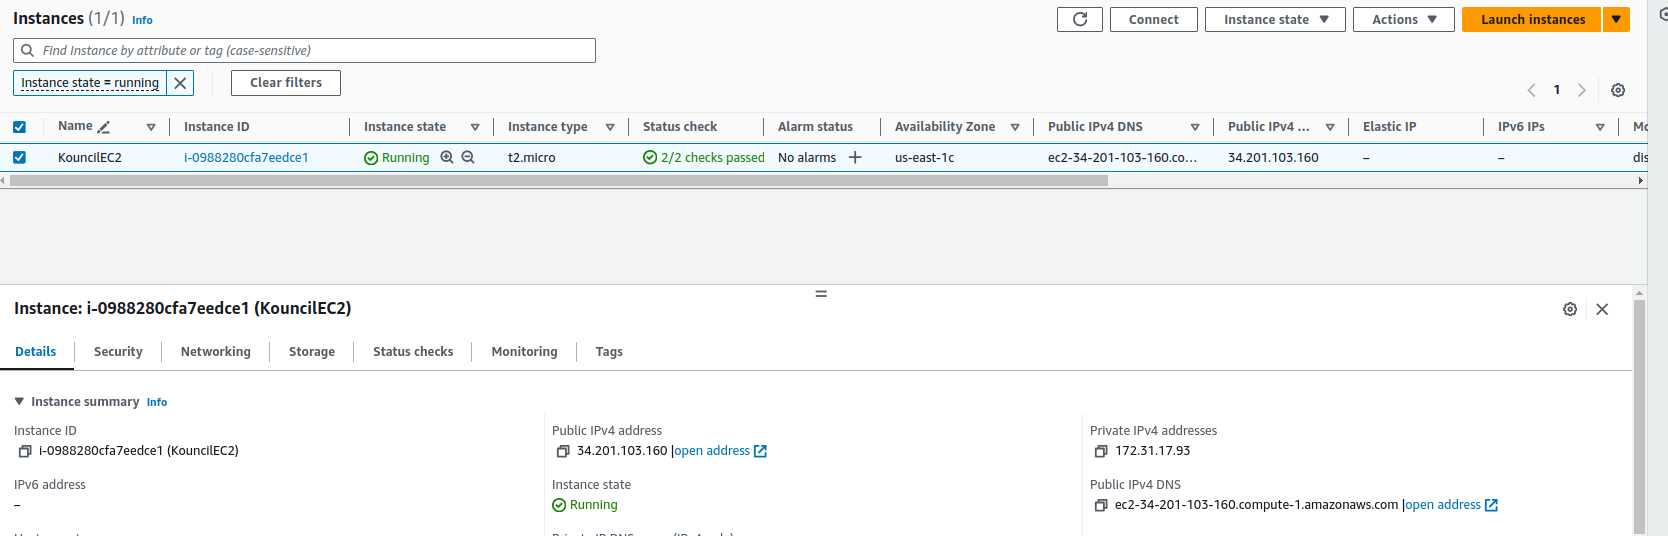 Details of instances where you can check the public DNS address
Open it in a new browser window. You should see the Kouncil login page.
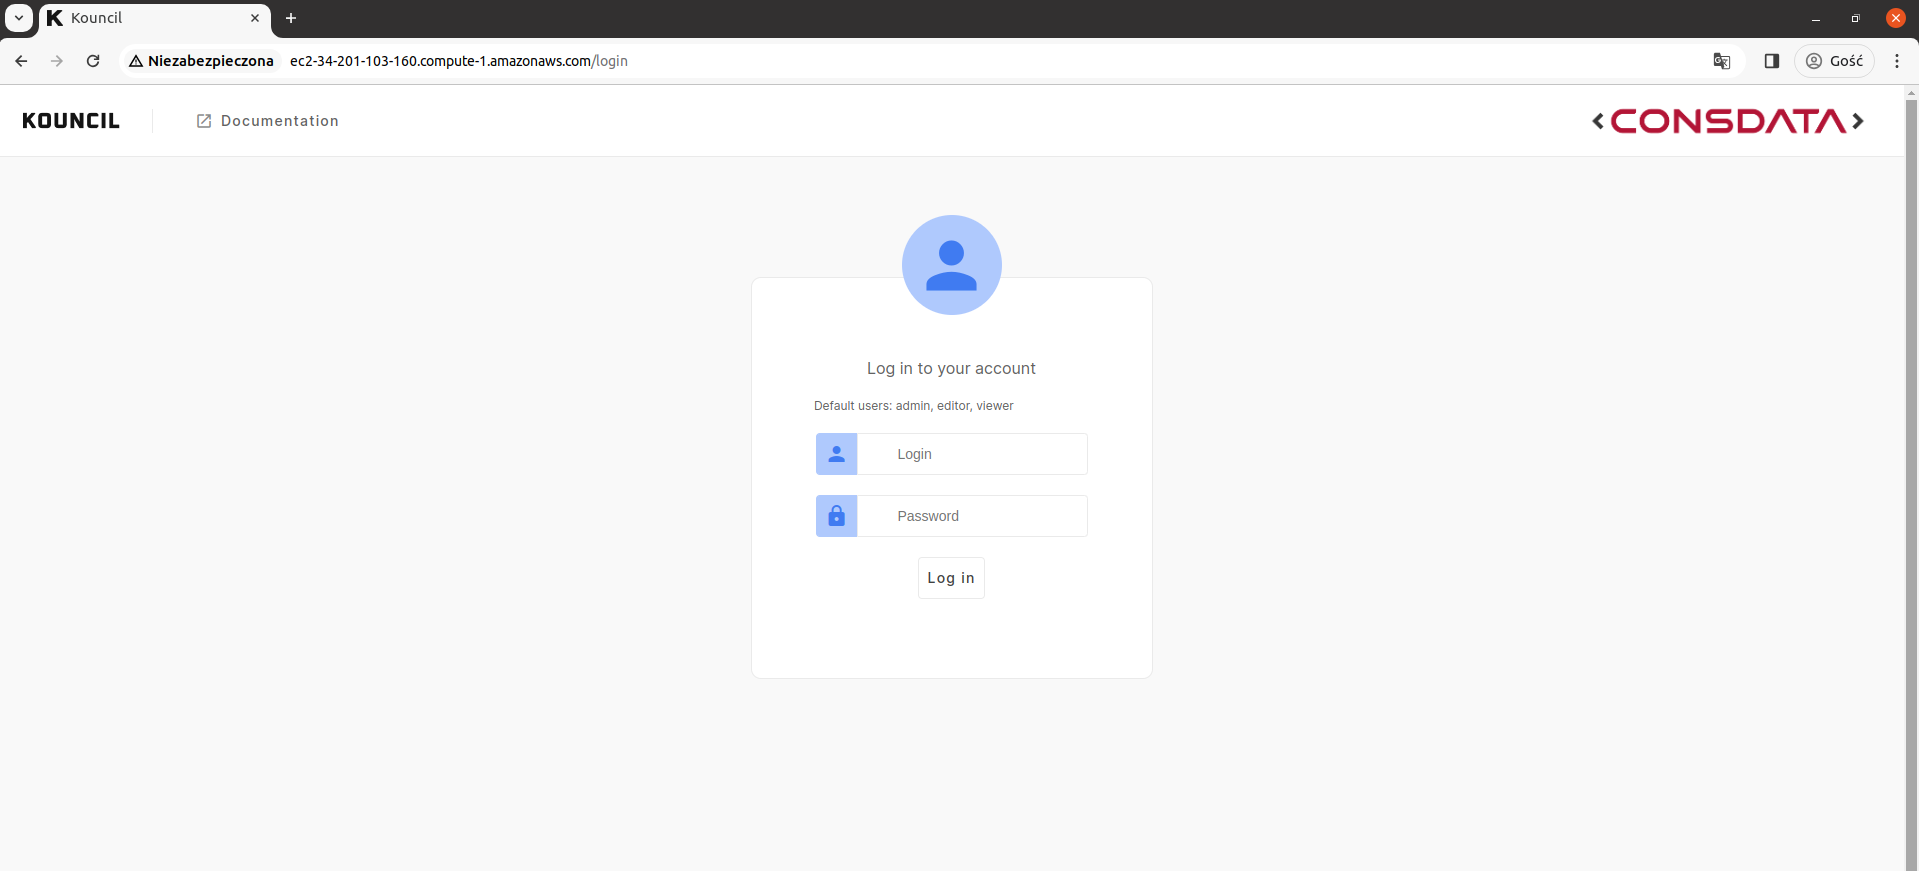 Kouncil login page
After logging in as a user with administrator permissions, you will see a list of available Kafka brokers.
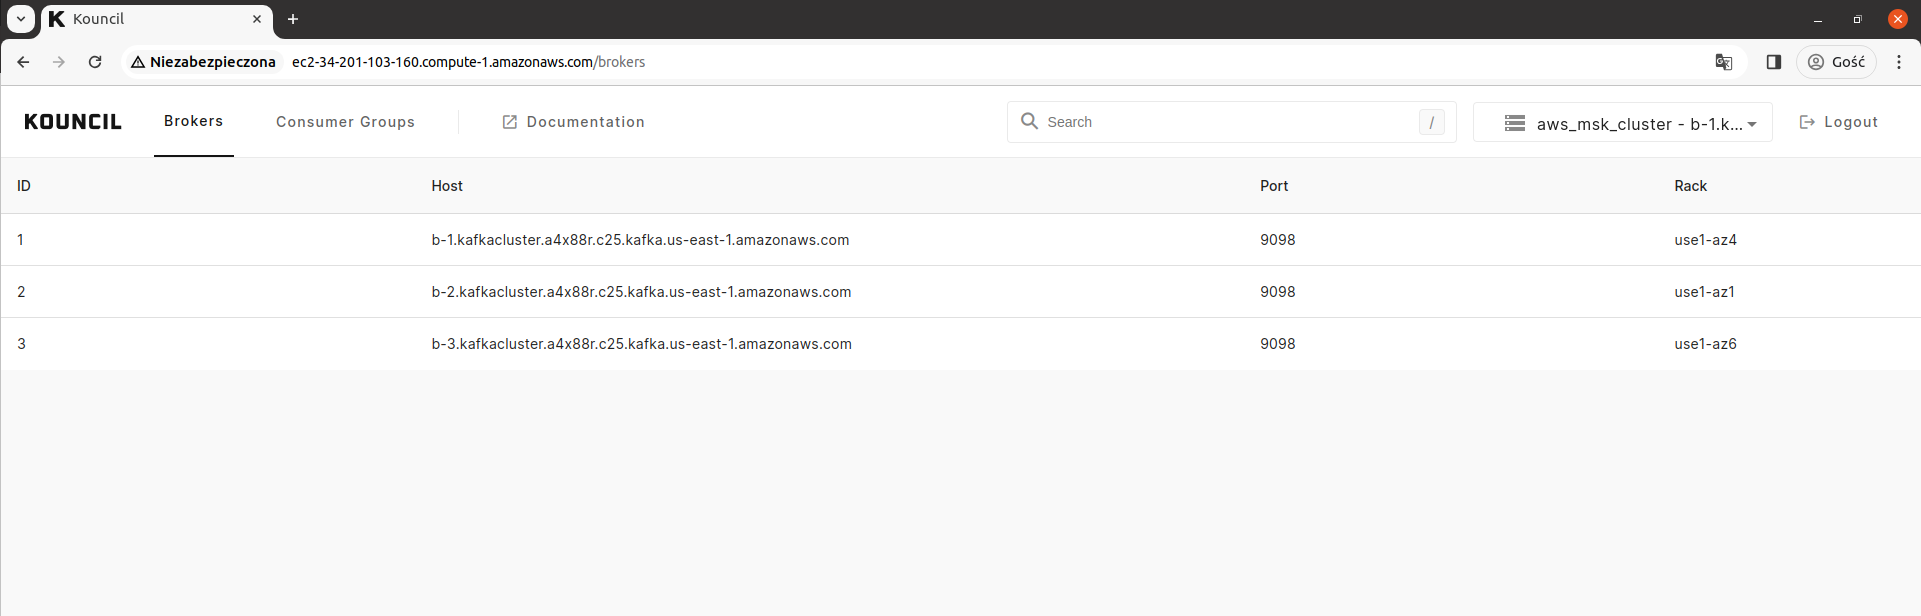 Brokers available on a running Kafka
Option 2 - Setting public access to Kafka
To make the cluster accessible from outside the AWS infrastructure, we need to meet several conditions.
First - enable public access to the cluster. To do this, go to Networking settings, expand the options available under Edit, and select Edit public access. Check Turn on and save the changes.
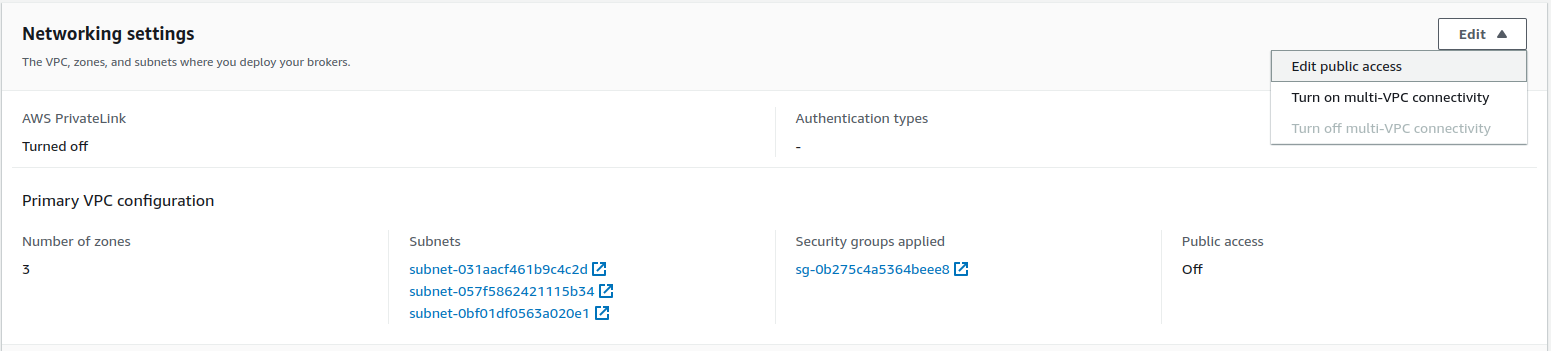 Cluster networking settings
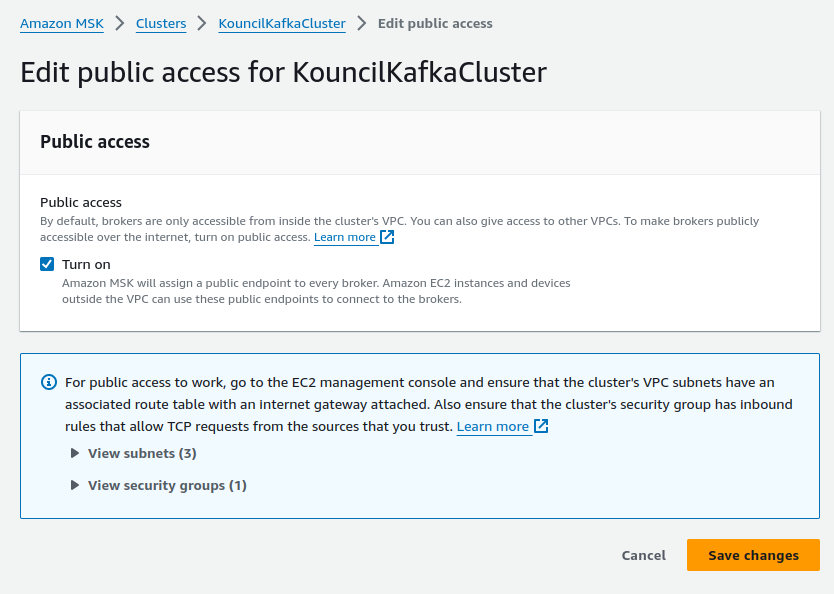 Enabling public access to the cluster
Another important thing is to check the configuration of access to the cluster from outside the AWS infrastructure. All subnets used by the cluster must be public, i.e., they must have an Internet gateway with external access defined in the routing table.
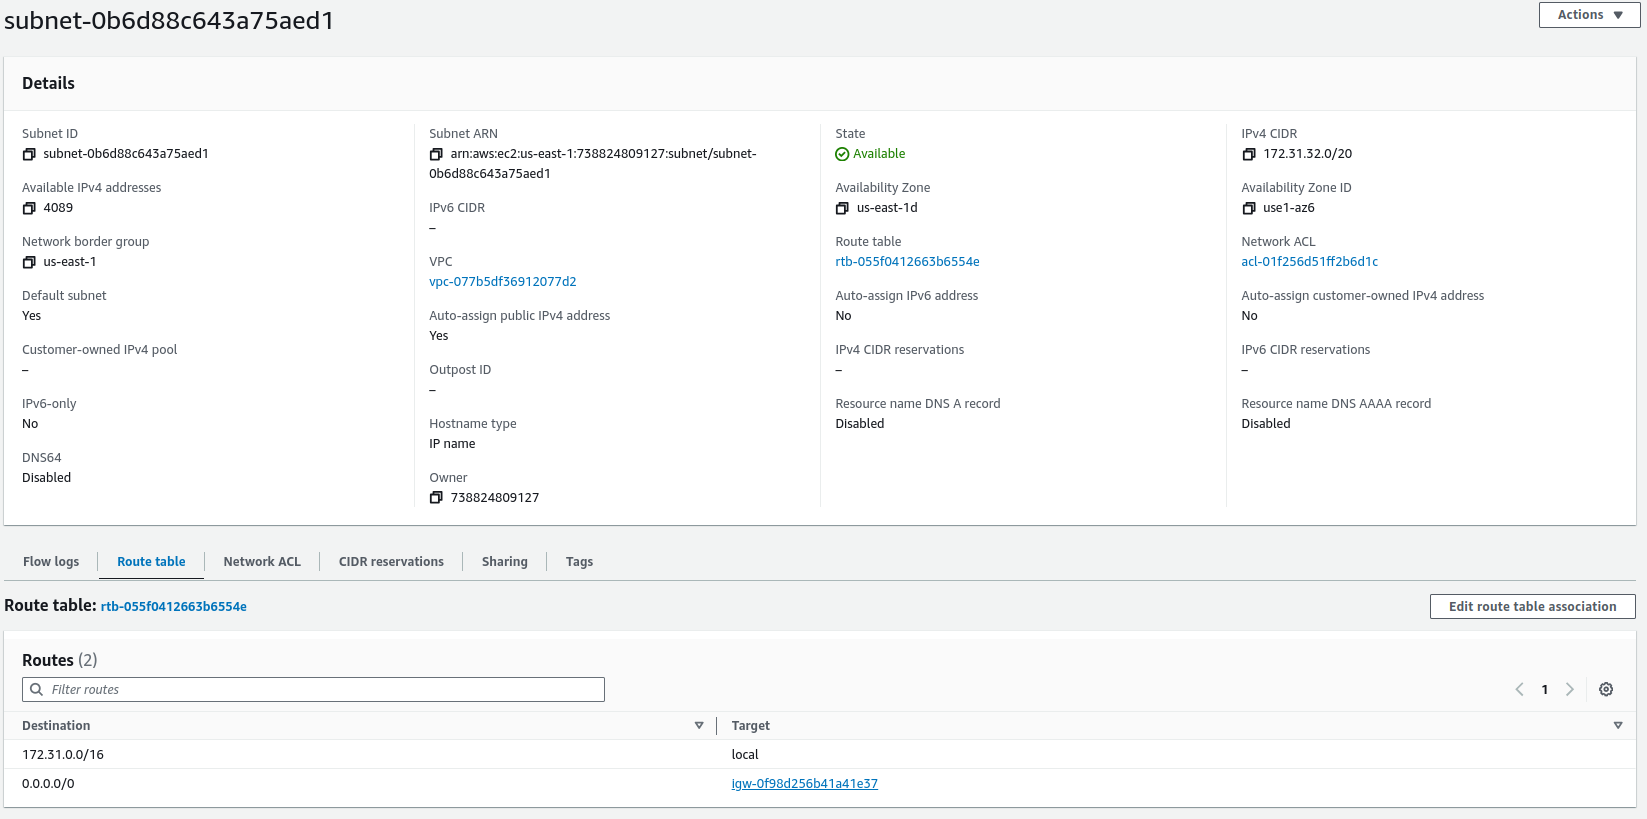 A subnet with an Internet gateway with external access defined in the routing table
In addition, the security group used by our cluster must allow TCP traffic from the IP address that we will use to connect to Kafka. The security groups that the cluster uses are listed in its networking settings. In the security group details, you can see the rules for inbound and outbound traffic.
Let’s edit the inbound traffic rule (Edit inbound rules). Select Custom TCP as the type, and in the Port range field, enter the port on which Kafka brokers will be available (9198).
For the Source, we can choose from several options:
- Custom enables defining the exact addresses or address ranges that are to access the cluster
- Anywhere-IPv4 enables anyone from outside to access the cluster
- Anywhere-IPv6 enables anyone from outside to access the cluster
- My IP - enables access to the cluster only from the IP address of the machine on which you configure the cluster
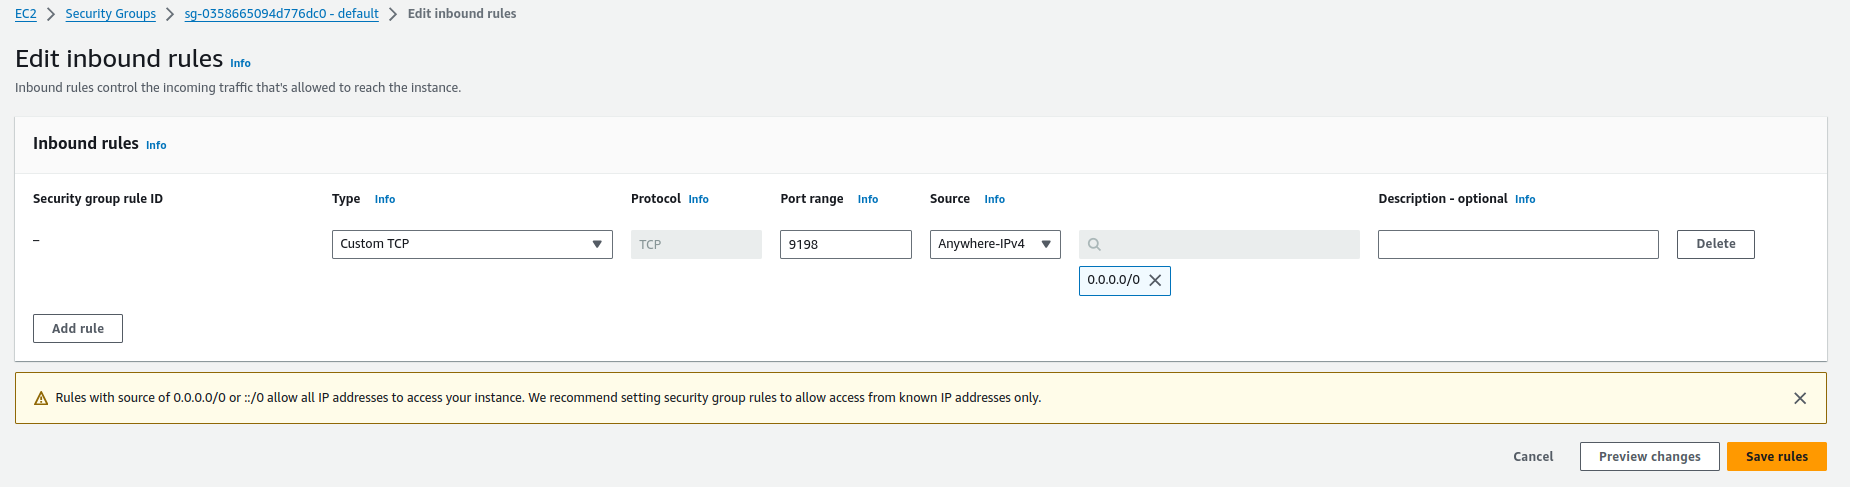 Editing the incoming traffic rule for the cluster
Finally, save the changes by clicking on Save rules.
The last condition is creating a user that we will use for authentication when connecting to Kafka. Go to the main IAM page and select Users from the side menu, then Create user.
When creating a user, we have several options for connecting the above-defined policy. You can do it using a group defined for users or connect the policy directly to the user. After creating the user, generate an access key. I suggest you save it, as you will need it when connecting to Amazon MSK from Kouncil.
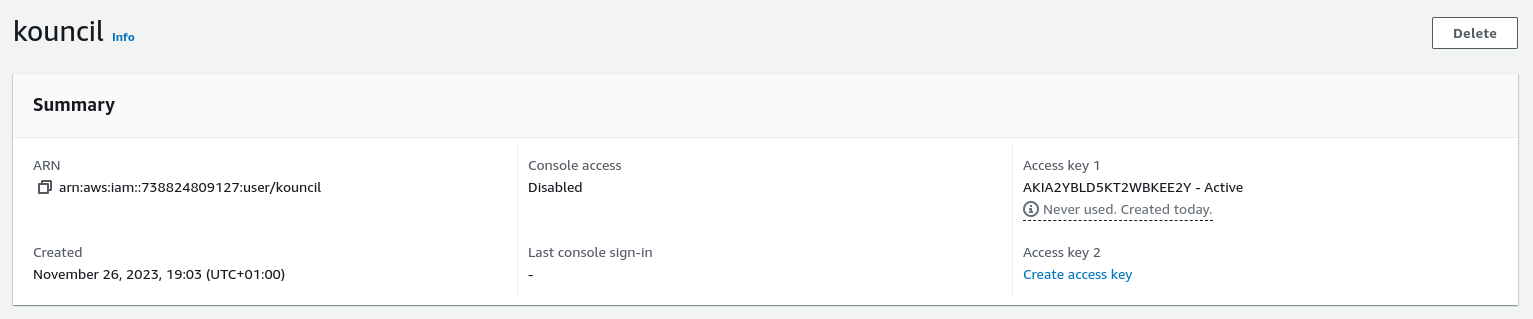 Created user with generated access key
Connecting to Kouncil
Connecting to Kouncil comes down to specifying the public address of the broker in the Kafka cluster configuration and the rest of the connection parameters. You can find an example configuration here: Advanced config - Amazon MSK Kafka cluster.
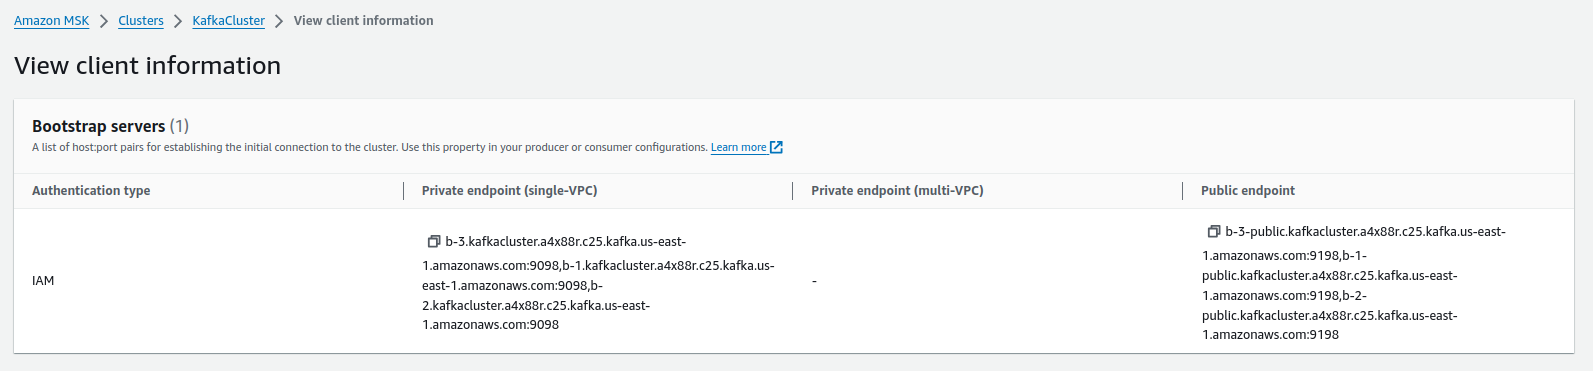 Kafka brokers’ public addresses
You can use the previously saved access key as environment variables. If you run Kouncil using Docker, you can specify them using the -e flag:
- -e AWS_SECRET_ACCESS_KEY=
- -e AWS_ACCESS_KEY_ID=
After logging into Kouncil, you should see the list of topics created on the given Kafka broker.
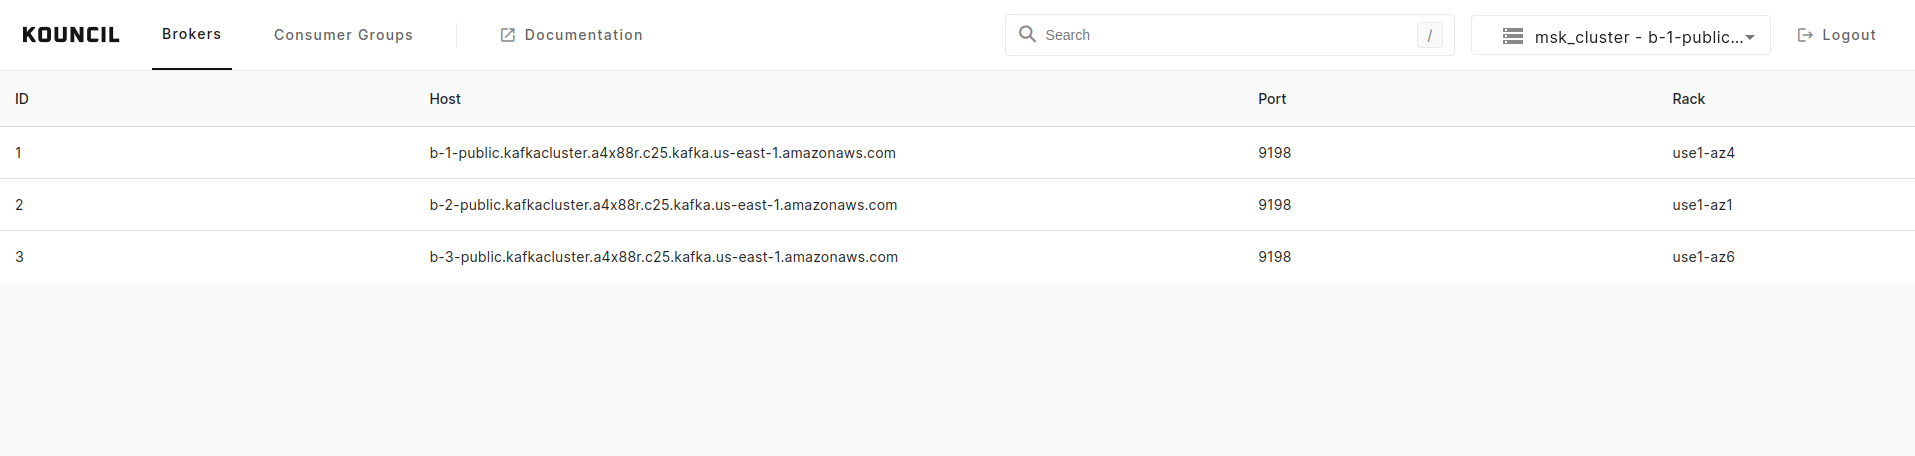 List of brokers from the connected Kafka Amazon MSK
Summary
In the above post, we explored two ways of connecting Kouncil to a Kafka cluster hosted on Amazon Managed Streaming for Apache Kafka (Amazon MSK).
Translation by Justyna Wiatrzyk-Guzik